Flathead 6 Hot Restart Improvement addresses one possible issue contributing to poor restarts of your flathead 6 when it is fully warmed up. It’s a gas problem related to the hot engine compartment. There can be other electrical issues or tune up issues but this article focuses on the gas issue.
Jerry Adams raised this issue at one of the last meets when his 53 Plymouth was not in the mood for a prompt restart. His car was particularly challenged because of the dual exhaust manifolds which have more surface area & take up a larger portion of the engine compartment than a stock exhaust manifold. Actually Chrysler got around to addressing this issue in the last generation of flathead 6’s so some of the following discussion comes from observing design changes made on a 1959 Plymouth flathead and comparing it to Jerry’s 1953.
The vector file for the following discussion is as follows:
Word document (.doc): PartsNeededForHeatSoakReduction
PDF document: (.pdf): PartsNeededForHeatSoakReduction
Content of the files is as follows:
Background: Mopar flathead 6 can get hard to start on a hot restart.
Heat radiated & conducted from the exhaust manifold(s)/headers is trapped between the right side of the flathead and the passenger inner fender liner. It rises and heats the carb float chamber. Additionally, heat radiated off the exhaust manifold strikes the bare heat conducting steel line, fuel pump, and fuel filter which readily transmits heat to the incoming fuel. Heat conducted from the manifold into the carb flange contributes to adding more heat to the carb. Heat buildup can get excessive and effect your ability to restart the engine. Early 30’s cars are somewhat less effected since the louvered hood aligns with the area of concern but 50’s cars are more likely to exhibit the problem due to the very little relative clearance between exhaust manifold, fuel line/fuel filter, and inner passenger fender liner.
One look at a stock late generation flathead 6 reveals some of the ideas the factory may have embraced to combat some of the above heat transfers to the fuel:
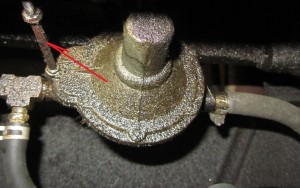
- Light colored heat shield between fuel pump and exhaust manifold
- Light colored heat shield between carb and exhaust manifold
- Heat conducting resistant thick spacer between carb and manifold
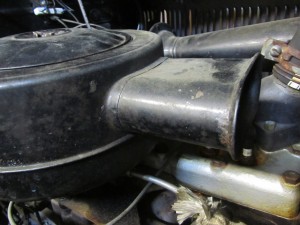
- Air Cleaner with snout to catch air from front of engine compartment
Add to that your own design including light colored insulation & radiant highly reflective shield of fuel line, relocation of the fuel line & fuel filter away from manifolds, use of fuel injection hose instead of the more heat conducting steel line, and relocation of fuel filter down low to achieve further results to combat undesired heat effects on the fuel system.
Parts needed:
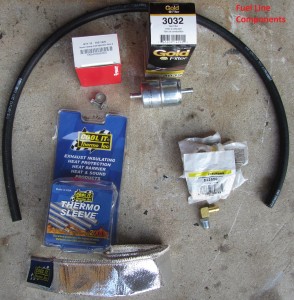
- Edelmann inverted flare to hose barb right angle fitting for carb & fuel pump (check your fuel line size to pick the correct one):
Catalog Number Item Name Inverted Flare Tube Hose Size
822440 Clamp Style 90° Male Elbow 1/4″ 1/4″
822540 Clamp Style 90° Male Elbow 5/16″ 1/4″
822550 Clamp Style 90° Male Elbow 5/16″ 5/16″
822560 Clamp Style 90° Male Elbow 5/16″ 3/8″
822660 Clamp Style 90° Male Elbow 3/8″ 3/8″
Try your friendly auto parts shop or Amazon or Ebay as your backup source.
- Fuel injection hose between above carb and fuel pump fittings
Fuel injection hose matching above barb hole size (SAE 30R9 or R14) installed to be furthest away from manifold (usually toward passenger fender and forward when at fuel pump level
- Fuel injection clamps matching above hose size
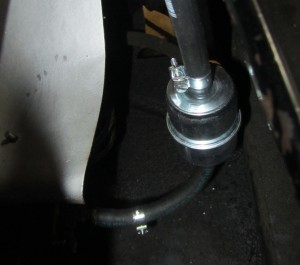
- Move fuel filter out away from manifold by switching to a metal inline filter near the fuel pump
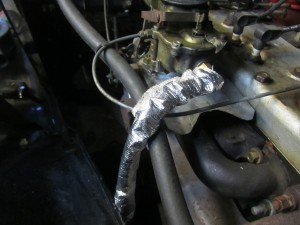
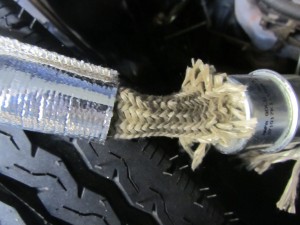
- Wrap line & filter with light colored braided fiberglass insulation sleeve wrap such Thermo-Tec 11152 and sleeve such as supplied by Thermo-Tec 14020 Sleeve Protector
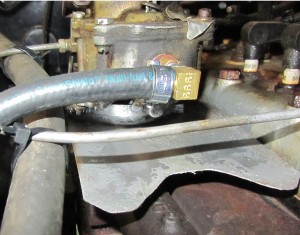
- Install heat shield at base of carb shaped to block heat rising toward carb float bowl
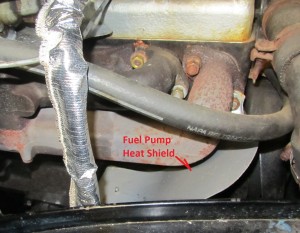
- Install heat shield between the fuel pump and exhaust manifold
- Install spacer(s) between carb and manifold
Keep it safe by insuring the new fuel injection hose will not come in contact with the exhaust manifold or any sharp edges when the engine is floating or rocking. Each car model may need a different routing to be safe from damage (just like a steel line) so your mechanic must use the best judgement in insuring the line is safe from puncture or overheating (caused by contact with hot surfaces).
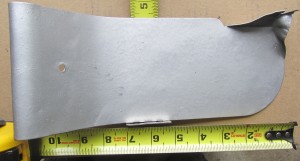
The below pictures apply the above methods on a mid 30’s application shown because it’s the best application to get pictures since the hood side panel goes up and out of the way with minimum fender obstructing the camera view. The below installation used the Edelmann 82550 fitting since the original installation used a 5/16 steel fuel line. Heat shields for the carb and fuel pump came off a 1959 flathead but it would be possible to fabricate your own. Dimensions have been provided as well as extra views and details to facilitate the bending and cutting of the sheet metal. Stick to light colors or aluminum color to maximize the radiate heat shielding effect.
Installed Fuel Pump Heat Shield:
Fuel Pump Heat Shield Details:
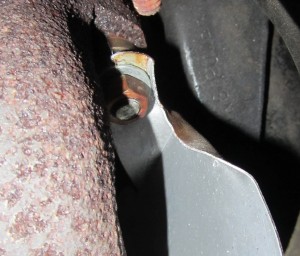
Fuel Pump Heat Shield Upper Support Off Manifold Bolt:
Fuel Pump Heat Shield Lower Support Off Post At Fuel Pump:
Installed Carb Heat Shield:
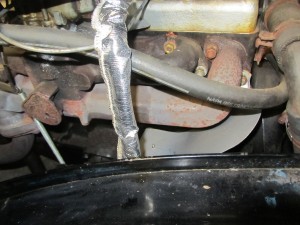
Gas Line & Fuel Filter Routing—-Gas Filter Down Low and against Frame Rail:
Gas Line Immediately Turns Out From Carb To Inner Fender Well:
Gas Line Drops Down Immediately Next To Hood On This 30’s Model:
Fuel Injection Hose Gas Line Gets Braided Fiberglass Insulation Sleeve & Radiation Sleeve:
Cooler Air Gets Routed To Carb By Using Air Cleaner With Snout Pointed Away From Exhaust:

